Still no assignment from my publisher – it’s probably going to be after the New Year, I’m guessing – so I’m going to show you how I work. I promise, as soon as I get deeper into the publishing process you’ll be the first to know.
For the next part, reference the photo below. This is my kitchen table, one of the places I work. I go here when I need a solid surface, like when I’m doing my note cards. Note: do not attempt to adjust the picture, I’ve blurred the words on the note cards and my pad because I ‘m working on a sequel to the novel being published next year (spoilers, sweetie). I’m not very far along, there are going to be a lot more of each type of card.
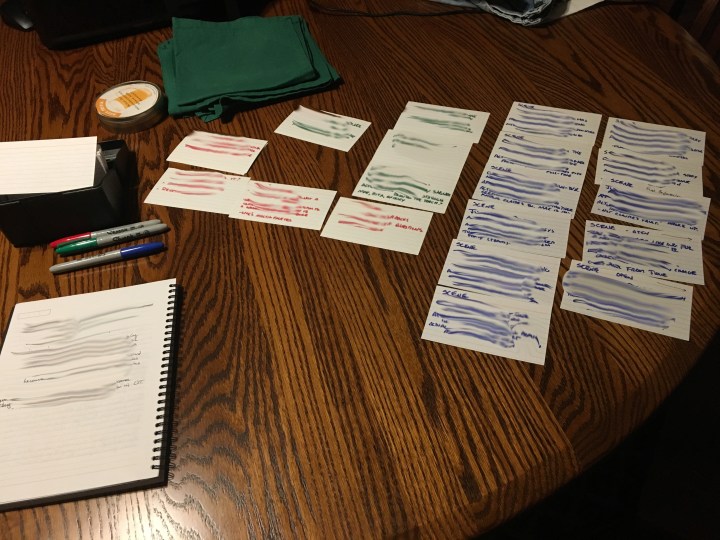
I use note cards in my plotting. Over the years I’ve found it’s easier to move things about, add, remove, and enhance. There is a method to this:
- Red cards are definite actions, emotions, or events that drive the plot. These need to be in the story explicitly. For instance, the crime that sparks the plot, including all the details the reader discovers over the course of the story.
- Green cards are character elements that are softer than the red cards. A character’s initial outlook, for example, or the change that the story provokes in them. These are not explicit in the story, but emerge out of it. The ‘show’ in ‘show, don’t tell.’
- Blue cards are scene cards. The basic building block of a novel is the scene, at least the way I do it. There’s not enough room on a card to go into all the detail I need in a scene, these are really just detailed place holders. I can also tack these onto the cork board in my office so I can follow the flow of the narration. (see below for more on scenes)
The spiral note pad in the bottom left is a small pad I carry with me most places, where I write down whatever I’m thinking about the story. I do tend to repeat myself over time, so I re-read my notes probably once a week. The things that look like red, green, and blue Sharpie markers are exactly that. The black box is a note card holder. The round thing is a container of beer-themed coasters. The green things are cheap cloth place mats.
The Scene
A long time ago, in a foreign land (Los Angeles), I used to be a working actor. I didn’t get rich doing it, but I did buy a fancy convertible with the money I earned acting, so I’m ahead of 90% of working actors. I started acting because, in order to make my writing better, I wanted to know what actors did. I discovered I was a pretty decent actor, so I stuck with it, got an agent, landed some gigs, made some money. Much more important, though, was the scene breakdown I learned as an actor. It works so well I started using those elements in my writing, which got much tighter, and more emotional. It’s not a secret, so here’s how I break a scene down. From my acting teacher June Chandler*, who I’m sure got it from her teachers at her school, it’s called ‘The W’s.’ She even gave us a little business card with the W’s on it, which I still have and still refer to all the time.
WHAT has just happened? The MOMENT BEFORE. The Character’s emotional state.
WHAT is happening? The Apparent EVENT. Actions/Behavior
WHAT do you want? The OBJECTIVE or Actual Event. Emotional need.
WHERE are you? The ENVIRONMENT. Create a setting.
WHO are you? The CHARACTER and Relationships.
WHAT is the obstacle? The CONFLICT.
I’m sure any number of writing books give a similar breakdown or approach, but this one is specific to an actor navigating a scene as an individual. It’s a rubric for how an actor should break a scene down to digest it and turn those details into a performance. But, as it turns out, it’s also a very handy method for a writer to flesh out a scene, you just have to define the W’s for all characters in the scene.
Next time I’ll go through how I use The W’s to build up a scene in a novel.
* June’s amazing, and I love her a lot. I’d take a bullet for her, and that’s not a metaphor.
